Healthy and practical suggestions to pre-prepare your meals
Are you a pre-prepper? Meal prepping beforehand, especially if you have a busy schedule, has many advantages including having healthy homemade food ready to take to work or at home when last minute cooking often results in eating out or less healthy takeaway meals. While meal prepping might sound like a lot of work, it can be a pretty smart plan:
- It's normally cheaper than eating on the go or buy in the canteen
- It is often healthier as you make conscious and varied choices
- And you'll be less tempted to eat 'bad things'
Begin with a plan
Take the weekend or another day convenient for you in your weekly agenda, how does your week look like in terms of food? Workdays, holidays, courses, sports, eating, working one day at home? They all affect how your breakfast, lunch or dinner looks. Think about which days you want to have control over what you eat and make a menu (which you can put together with the help of tips below). Then you can create a shopping list. Personally, I'm doing this on Sunday as I have time during the day to make preparations, the errands and the evening to relax and enjoy the preparation.
Breakfast
If you are like me and have your morning chronically short of time, you might even forfeit your breakfast? Not a great idea as you will have a roaring stomach at 10am and grab something that you often regret. Therefore on Sundays I make a big batch of smoothies with different vegetables and fruit ready to go, 1.5 litres for example, which I pour into a glass resealable bottle that can last 3 to 4 days so I can enjoy a smoothie in the morning. I also make myself a batch of healthy granola bars that will see the week out AND, this really helps me get off to a good start.
Lunch
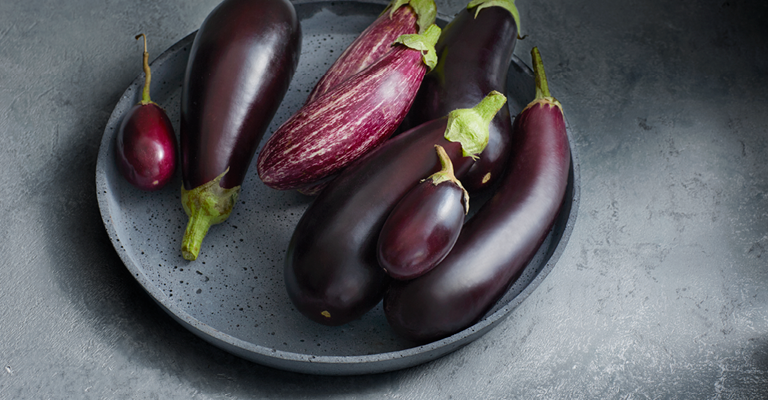
For lunch I have three tips: Make your own salad, homemade spreads and a rich soups. I love salads for lunch and here you can vary endlessly, you can use already prepared ingredients for dinner, by cooking a little more, think of rice, pasta or couscous. Then you've got the basis for a salad. Additionally, you might have some leftover vegetables, either raw or cooked, such as zucchini, eggplant and capsciums, which you can toss into a salad with a little dressing. For example, boiled or steamed broccoli does well in a salad. You can add boiled eggs, cheese or nuts, so you later in the day will not be hungry.
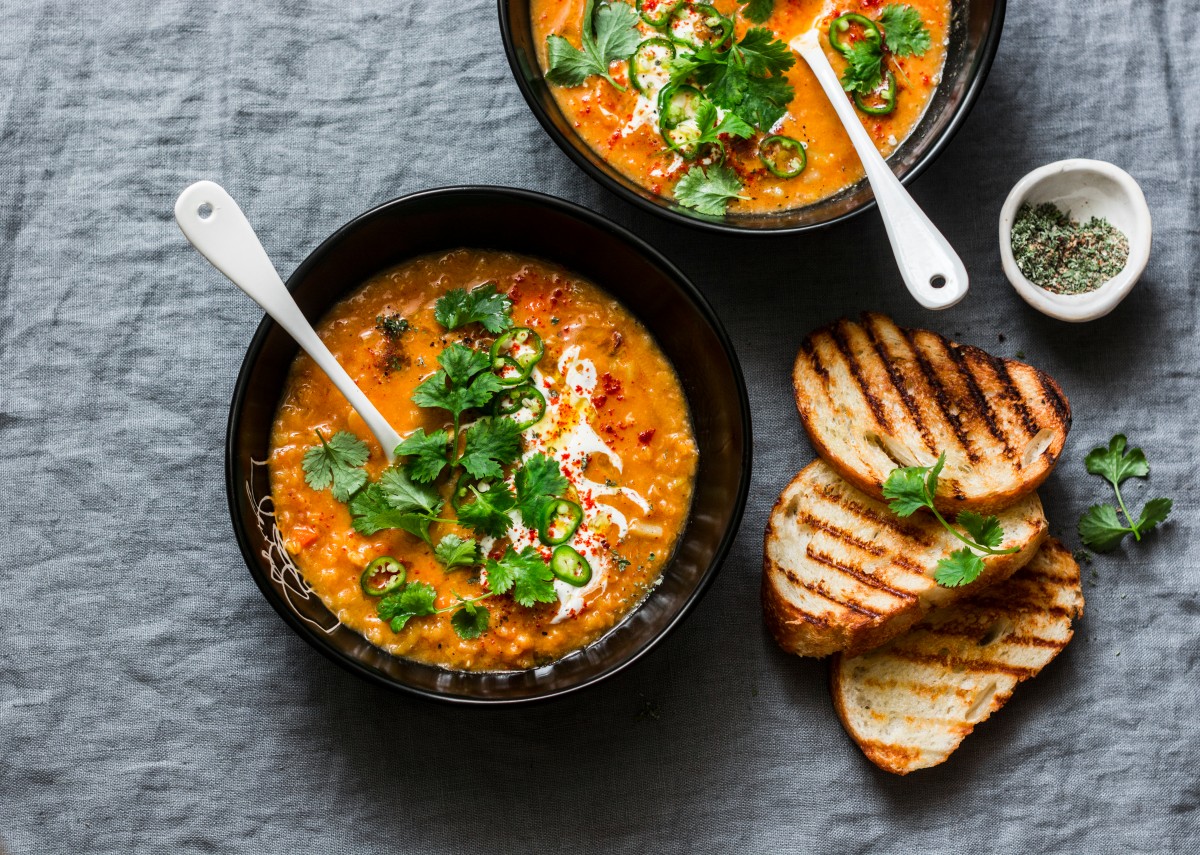
You can always take some homemade soup. Make sure that you have a good thermos bottle that does not leak, or that you have a microwave at your disposal so you can reheat the soup. Delicious with a tasty hummus sandwhich. And this brings me to the next point: Have lots of toppings for your bread which by itself is bland and often tastier and healthier with the things like hummus, avocado, black bean paste, and even better when combined with a slice of tomato or cucumber. All this can easily keep a week in the refrigerator.
Dinner
Do you have a sports night or do you need to go quickly to the next appointment? Instead of grabbing some fast food with french fries or eating a kebab, you can pre-cook a healthy meal that you eat for example at work or stop in a park on the way. The soup is a good option here again. A rice or pasta dish is easy to heat or a quiche or even cold is still delicious. Another easy meal is baked omelette with stir-fried vegetables rolled in, a little sambal (chili) for extra flavour or mix some curry powder and you have a tasty dish.
There are many more examples of meal prepping, like cut fruit with some yogurt, oats overnight and you are also becoming more creative as you bring more food. Are you ready to start prepping now you have read this blog? I'd love to hear your ideas and suggestions.

A simple yet luxurious and flavorful salad is a must-have for the holidays. How do you make a salad easy yet sophisticated? By using pure, slightly more exclusive ingredients or preparing familiar ingredients in a unique way.
In this salad, we’ve chosen radicchio, a slightly less common lettuce variety that can easily be substituted with endive or red chicory for variety. The pears, caramelized in butter and honey, add a sweet touch. We also include fennel, one of the most underrated vegetables. Thinly sliced, it provides a light crunch and a subtle anise-like flavor that pairs wonderfully with the slightly bitter radicchio.
Preparation
Prepare the Pears:
Heat the butter in a frying pan. Meanwhile, slice the pears. Brown the pear slices in the butter, then add the honey in the last few minutes to caramelize. Season with salt and set aside.
Prepare the Vegetables:
Thinly slice the fennel and roughly chop the radicchio (or endive/red chicory).
Make the Dressing:
Finely chop the garlic and fresh herbs. Mix the sour cream with mayonnaise, then stir in the garlic and herbs. Season with pepper and a pinch of salt if needed.
Assemble the Salad:
Arrange the radicchio (or endive/chicory) on a serving platter. Add the fennel slices and top with the caramelized pears. Drizzle small amounts of the dressing over the salad, then garnish with roughly chopped pistachios and fresh dill. Serve the remaining dressing on the side.
A multi-colored lasagne has been on our wishlist for a long time! We thought it might be too complicated or time-consuming to make, but it turns out this rainbow lasagna is surprisingly simple. It doesn’t take much longer to prepare than a regular lasagna. Even better, it includes three different types of vegetables, providing a variety of colors and nutrients. Eat the rainbow!
Preparation
Preheat the Oven:
Preheat your oven to 200°C (390°F) and line a baking tray with parchment paper.
Prepare the Vegetables:
Cut the beets into chunks and fennel into thin strips. Quarter the red onion. Spread these over one half of the baking tray (or use a separate tray).
Place the pumpkin pieces, garlic cloves, and rosemary sprigs on the other half of the tray (or on another tray). Drizzle everything with olive oil.
Roast Vegetables:
Roast the vegetables in the oven for 20–25 minutes, until soft. Keep the oven on.
Make Purees:
Blend the beets, fennel, and red onion in a food processor or with an immersion blender until smooth. Season with salt and pepper.
Blend the pumpkin with the squeezed garlic cloves until smooth. Season with salt and pepper.
Blend the ricotta with the basil until smooth. Season with salt and pepper.
Assemble the Lasagne:
Spread a few tablespoons of béchamel sauce on the bottom of the baking dish. Layer with lasagna sheets.
Create layers in the following order:
Half of the pumpkin puree
Lasagne sheets
1 tsp sriracha
Remaining pumpkin puree
Lasagne sheets
A few tablespoons of béchamel sauce
Half of the basil-ricotta mixture
Lasagne sheets
1 tsp sriracha
Remaining basil-ricotta mixture
A few tablespoons of béchamel sauce
Lasagne sheets
Half of the beet puree
Lasagne sheets
1 tsp sriracha
Remaining beet puree
Lasagne sheets
A few tablespoons of béchamel sauce
Grated cheese
Bake the Lasagne:
Bake the layered lasagne in the oven for 30–35 minutes. Let it cool slightly before slicing.
Stop! Look no further. This will become your go-to appetizer for parties, New Year’s Eve. It’s easy to prepare, even though it looks like you’ve spent hours in the kitchen. The delicious combination of mildly sweet beet, creamy ricotta, and tangy blue cheese is already amazing, but paired with balsamic crema and mint oil, these easy bites are absolutely irresistible!
Preparation
- Slice the beets into thin rounds, ideally using a mandoline slicer (watch your fingers!). Place the slices in salted water for a moment after cutting.
- In a bowl, mix the blue cheese with the ricotta and season with pepper. Optionally, transfer the ricotta mixture into a piping bag with a large nozzle for easy application.
- Blend the mint, olive oil, and a pinch of salt and pepper using an immersion blender to make mint oil.
- Arrange the beet slices on plates or a large serving platter. Spread or pipe the blue cheese ricotta mixture onto the beet slices.
- Drizzle with mint oil and balsamic crema. Serve immediately.
Did you know you can roast radishes in the air fryer to make them sweeter? Radishes naturally have a crispy, bold, and peppery flavor, but roasting them brings out a much sweeter side. Serve them with garlic yogurt for a delicious twist. You can opt to present this dish on a large platter for everyone to serve themselves (or let everyone dig in with a fork at the table), or you can easily make individual portions and serve these delightful roasted radishes with garlic yogurt as an appetizer or a unique side dish!
Preparation
- Preheat the oven to 200°C.
- Remove the tops and roots from the radishes and place them in a large ovenproof dish. Drizzle with half the olive oil, all the honey, and a generous amount of salt and pepper. Roast the radishes in the air fryer for 8 minutes. Every air fryer is different, so check occasionally to see if they’re done sooner. If you can easily pierce them with a fork, they’re ready. Toss the warm radishes in the honey once cooked.
- Crush or finely chop the garlic and mix it with the yogurt. Season the garlic yogurt with salt and pepper and set aside until serving.
- Cut the wraps into triangles and spread them out on a baking sheet lined with parchment paper. Drizzle with the remaining olive oil. Roast the wraps in the oven for 8 minutes until crispy.
- Spread the yogurt on a platter and arrange the radishes on top.
- Serve the roasted radishes with garlic yogurt alongside the tortilla triangles.
Zucchini is a criminally underrated vegetable. It can cop a bad rap, like many vegetables - I think that’s because we’ve often eaten it over-cooked or poorly prepped.
Sometimes, the more you cook a zucchini, the worse it gets. They get treated like an eggplant or firmer squash, get over done and don’t taste their best. Eating them al-dente or even raw is so fantastic.
When cooking them, I like to cut them lengthways to get some good surface area, then quickly char them on a bbq or skillet – a bit of olive oil, salt and pepper – and it’s all you need. They are so perfect!
Here, with the humble veggie peeler, we’re prepping them to eat raw in a kind of quick-pickle. Easily made ahead of time, it’s a really satisfying barbecue side, great on burgers or on a ploughman’s platter, on a bahn-mi or with some pulled pork. A lively addition to any summer spread!
Preparation
- Thinly slice the red onion. Add vinegar, water and sugar to a small saucepan and simmer until the sugar is dissolved. Take off the heat, add the red onion slices and let them pickle while you prepare the salad.
- Wash the zucchini thoroughly and trim off the ends.
- Hold the zucchini firmly at one end, run the vegetable peeler along the length.
- Add the shaved slices to a salad bowl along with sliced mint leaves and crushed peanuts.
- In a separate little bowl, prepare the dressing. Whisk together fish sauce, fresh lime juice, water, sugar, minced garlic, and sliced red chilli.
- Pour the dressing over the salad and carefully toss to ensure the zucchini and other ingredients are entirely coated.
- Just before serving, garnish with more mint leaves and crushed peanuts.
This is a produce-driven dish that is all about finding some fantastic tomatoes.
There can be some below-par tomatoes out there in the supermarkets, destined for soups and stews. When I find quality produce - I want to take the opportunity to pare back the ingredients, intensifying the flavours that are already there, adding as little as possible.
With this recipe, we’re not compensating with sugars and sauces – we’re using a little bit of creativity and a few good ingredients. There’s very little intervention before the ingredients reach the plate.
The tomatoes get a moment in boiling water to take off the skin, and then a low and slow dehydration in the oven to concentrate those amazing flavours. The low, slow cook also means the tomatoes hold their structure and shape, cooking through without collapsing.
The olive oil, so slowly heated, is going to take up the flavours of whatever you add. Here we’ve got a bit of garlic and a little thyme.
A really beautiful, surprisingly easy and impressive plate.
Preparation
- Preheat the oven to 100°C.
- Bring a large pot of water to the boil.
- Prepare a bowl of ice water.
- Without removing the tomatoes from the vine, carefully cut an x into the base of each tomato.
- Blanch the tomatoes in the boiling water for 15 seconds, then place into the iced water immediately. Remove the skins.
- Put the tomatoes in an oven tray, drizzle with 3 tablespoons of olive oil, add salt, garlic cloves and thyme, then slow roast in the oven for 1 hour and 45 minutes.
- For the whipped feta, place the feta in a food processor and slowly pour in 3 tablespoons of olive oil as the blender is mixing. You should end up with a thick paste.
- To serve, spread the whipped feta on a plate. Carefully place the roasted tomatoes onto the feta. Use the juices from the oven tray and drizzle them over the top. Garnish with toasted pine nuts and fresh basil.
Tips from the author
Source some good quality tomatoes from your local grocer, you’re looking for a golf-ball size cherry or cocktail truss tomatoes, with nice colour, that’s really attached to the vine.
Good quality fetta is readily available, there’s some lovely products out there. Here it’s whipped up a little for a light airy texture. The creaminess of the cheese accentuates the acid and umami within each tomato.
Baby pointed cabbages are so sweet and versatile! I hope we start to see them more often in supermarkets.
They are sweeter than round varieties, great for both caramelising and eating raw. The short core makes them easier to shed for slaw, with fewer big chunks to pull out of the mix. The leaves are wrapped less tightly than round cabbage, so you can easily peel them off whole, for lovely stuffed parcels and rolls.
Also these pointed cabbages can be easily quartered – the structure of the core means the leaves hold their form when the head is quartered – like this recipe.
Preparation
- Preheat the oven to 180°C.
- Cut the cabbage into lengthwise quarters.
- Heat half the olive oil over medium-high heat in a heavy-based pan. Brown off the cabbage quarters individually in the hot pan, then set them aside.
- Add spices, tomato paste, crushed garlic, remainder of the olive oil, thyme and water to an ovenproof pan and simmer on medium heat for about 1 minute until slightly reduced.
- Place the browned cabbage quarters into the pan and press into the liquid so they come halfway up the pan.
- Cover the pan with a lid and place in the oven. Braise for 40 minutes, then uncover and cook for another 30-40 minutes or until tender.
- Remove from the oven and squeeze a little lemon juice over the top.
- Serve hot, garnished with sesame seeds, parsley or rocket.
Tips from the author
Of course, if you can’t find baby sweet pointed cabbages at your grocer, round cabbages will work too – but I urge you to try one if you see it! They are fantastic.
This is a beautiful and melt-in-your-mouth dish. It’s soft and rich, festive and fun. Perfect with a roast lamb or amongst a middle-eastern feast.
This is the Hotel California of gnocchi recipes. It’s an absolute classic. A #1 hit. It’s also the easiest gnocchi you will ever make.
You don’t need to labour over the potato, kneading it to the right consistency – the ricotta and flour together are much more forgiving and easier to work with.
The biggest secret with the perfect gnocchi is about about water vs flour. The less liquid you have, the less flour you need to use. Less flour means a lighter, more pillowy result.
So, make sure you drain the ricotta well, and get as much of the water out of the spinach as you can. I pop the blanched spinach all in a colander over the sink or a bowl and really push all the water out.
Make sure you use freshly grated parmesan, not just for flavour. Pre-grated parmesan is dryer and has a finer texture, which doesn’t melt into the gnocchi as easily.
Preparation
Roasted cherry tomatoes:
- Preheat the oven to 180°C.
- In a baking dish, combine cherry tomatoes, minced garlic, olive oil, salt, pepper and thyme. Toss everything to coat the tomatoes evenly.
- Roast the tomatoes in the preheated oven for about 10-15 minutes, or until they start to blister and become soft.
Spinach ricotta gnocchi:
- Blanch spinach in a pot of boiling water for about 15 sec, then drain and squeeze out excess liquid. Roughly chop.
- In a large bowl, combine the chopped spinach, ricotta, grated Parmesan, egg, salt, black pepper, and ground nutmeg. Mix everything until the ingredients are fully combined.
- Gradually add the flour, starting with 1 cup. Mix by hand until the dough comes together. You want the dough to be soft and slightly sticky but not overly wet. If it's too sticky, add a little more flour.
- Lightly flour a clean surface and your hands. Take a portion of the dough and roll it into a rope, 2.5cm in diameter. Cut the rope into gnocchi pieces, about 3.5cm each.
- Bring a large pot of salted water to a boil. Drop the gnocchi into the boiling water in batches. They are ready when they float to the surface. Remove them with a slotted spoon and place on a plate.
Burnt butter and sage:
- Melt the butter in a light-coloured skillet over medium heat. Add the fresh sage leaves to the pan.
- As the butter cooks further, it will go through several stages: foamy, then a light tan, and eventually to a golden brown color. This should take about 4-5 minutes. Stir the sage leaves occasionally.
- As soon as the butter reaches the desired color, remove it from the heat to prevent it from burning any further.
- Season the burnt butter and sage sauce with a pinch of salt and freshly ground black pepper to taste.
- Toss the gnocchi with the burnt butter and sage sauce and serve mixed with the roasted tomatoes.
Tips from the author
I like the chunks of spinach in this recipe. It’s not completely blended through, and you can still tell it’s spinach, the big flecks are quite pleasing. You could also use silverbeet.
When cooking, keep a close eye on the pot to see if they sink or swim. They are cooked when they float up to the surface.
The burnt butter and roast cherry tomatoes are a simple, easy way to serve these gnocchi. It’s such a crowd pleaser!
This is one of my favourite salads, because it’s so simple – and it really brings out the best of cucumber.
This recipe is a little bit like a pickle, without the complexity. It has that tangy, sharp vinegar and crunch of a pickled gherkin, but with extra crisp, aromatic freshness. It’s as perfect as a cucumber can get.
The dressing is simple but has depth. The salty soy and sharp rice vinegar combo is a bit like the Asian answer to a balsamic vinaigrette.
Smashing the cucumbers this way is not only satisfying, it also breaks up the cells that hold on to water in the fruit. Adding salt and sugar further draws that water out – and that water is then replaced with the fantastic flavours the dressing.
Preparation
- Smash cucumbers with the back of a chef's knife or cleaver to slightly crack them. Slice into bite-size chunks.
- Sprinkle salt evenly over the cucumber slices and toss to ensure they are coated evenly. Place the slices into a colander and allow to strain for 15-20 minutes.
- Rinse the salted cucumber slices under cold running water to remove the excess salt. Pat them dry with paper towels.
- To make the dressing, combine the soy sauce, rice vinegar, chili oil/flakes, sesame oil, olive oil, sugar, and ginger in a small bowl. Whisk until well combined.
- In a large salad bowl, toss the cucumber slices and mint with the dressing until evenly coated. Garnish with sesame seeds and spring onion.